1. A Brief Introduction to Unix
1.1 In this section
In this section, you will be introduced to python notebooks and the unix operating system.
You should have an understanding of:
- Unix as an operating system
- How to change your password (
passwd). - Directory structures in unix
- Relative and absolute pathnames
- The role and meaning of the characters
~.and..(twiddle, dot and dot-dot) - The unix commands
pwd,cd, andls
Commands in this section
1.2 Unix
This course will be taught mainly under a Unix operating system. The operating system allows you access to the running of the computer (and associated devices on the network), and enables you to be able to control what you want the computer to do.
There is some overhead to learning this (like learning a new language), but we will introduce you to the basic operations you will need in this session.
There are many online tutorials on unix. A good place to start backup material and some more features for the material we will cover today is software-carpentry.org
1.2.1 Using these notes
The interface for these notes is done using something called ipython notebooks, that we will return more to later.
Not surprisingly, this is mainly aimed at running commands in the python programming language.
In this section of the notes, we will be using unix commands, where we are working directly with the operating system (rather than in the python language and environment that is on top of the underlying system).
One really convenient feature of ipython notebooks is that you, the student, can simply download then (using the Download notebook button in the corner of the browser display) and then run them on your local computer. When you have downloaded a notebook, you can use it by typing:
berlin% ipython notebook
which will open a web browser with an interface tou your notebooks.
You can execute ('run') each block of code by selecting the code block (click on it) and simply hitting the return key. This conveniently works with basic unix commands as well as python commands.
As an example of some commands we will use later
cd ~
/home/geogg122
pwd
u'/home/geogg122'
These two commands (cd ~ and pwd) are unix commands (that we happen to have run here through the ipython interpreter). You can, as we have suggested, simply download the notebook and hit <return> to run these, but to get used to using the underlying operatoring system, you will want to open a terminal or shell tool (or xterm in some cases). This is a 'window' which has a command line prompt at which you can type and execute unix commands.
It will look something like this:
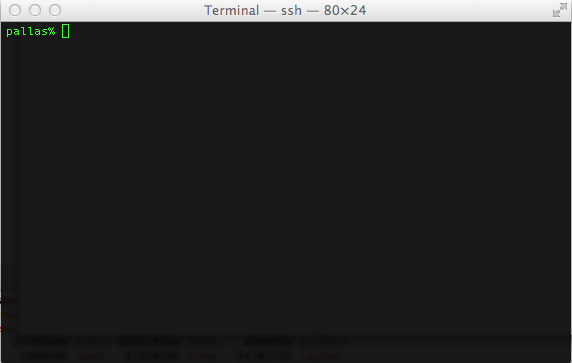
where, in this case the command line prompt is pallas%, where pallas happens to be the name of one of the computers we might use.
You type the commands at the prompt, then hit <return> (i.e. the return key) to execute (run) the command.
When you open a new 'terminal', you will usually be located in your home directory. We will discuss this further below.
Let's check that now, and introduce the command pwd (print working directory) that will print (in the terminal) where we currently are working.
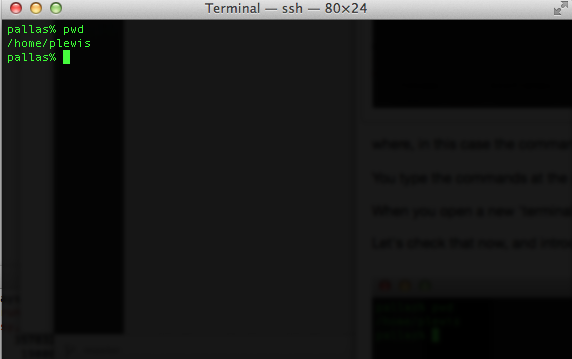
So, whilst you can simply hit <enter> in the code blocks here, we will want you to run the unix commands in todays session in a terminal.
Open a terminal now, and run the command pwd to get used to this.
1.3 What is Unix?
UNIX is a multi-user operating system: that is, a suite of programs which run on a computer and allows interface to the hardware and software available. It allows many users to share a powerful machine and all the available resources, each user running their own processes simultaneously. This true multi-tasking aspect of UNIX allows a far greater flexibility than is possible with other operating systems, even more recent multi-tasking versions of popular PC operating systems (note that the linux is simply a ‘flavour’ of UNIX & that the Mac operating system OS-X has a good deal of UNIX system within it). The advantages of a truly flexible multi-tasking operating system has been demonstrated with the popularity of UNIX in the scientific, engineering and financial communities, along with the rise of Linux and OS-X.
X11 is the windowing system that you will generally use to interface with the operating system. A key aspect of this has always been the idea of remote graphical user interfaces via X11, which allows a user to run and visualise processes on different Unix machines. You are not limited to accessing the computer you are sat in front of, but can easily make wider use of local or external resources. You will find this useful as you can log on to the UCL Geography Unix computers from outside UCL (from pretty well any other operating system) and (with appropriate X11 software such as cygwin or exceed, if you are working from a Windows computer, or directly from any Unix/linux computer os OS-X machine) run windowing sessions the same as if you were physically at the UCL computer (given sufficient bandwidth).
1.3.1 Workstations and networks
Workstations that run UNIX are not like the way most people use PCs running Windows... At any time of the day or night a UNIX machine is running literally hundreds of processes simultaneously: Some are long-term user processes (such as research experiments) placed at low priority to avoid affecting other users, which may run for weeks, but most are concerned with the second by second activities of maintaining the network.
Physically, the network consists of 'wires' (ethernet cables, phone lines, fibre-optic cables etc.) or wireless connections (locally and externally) running between computers both at local and remote sites. At the local level (within a University Dept. for example) the wires literally connect every machine to every other, either in a loop, or in a star-like arrangement with machines linked around central communications hubs. Such arrangements of connections, machines and attached peripheral devices is known as a Local Area Network or LAN. Larger arrangements of connections, for instance between departments in a university rather than individual computers, are known as Wide Area Networks or WANs.
It is through this ability to transparently network computers together that UNIX really gains its power. Very often the data a user processes on one computer is actually stored on another (a paradigm that has (indirectly) led to the development of the Internet and World Wide Web). Similarly it is commonplace to process data on one machine whilst physically sitting in quite a different location (even on a different continent!). The limiting idea of the machine that you are sitting in front of being the machine you are using for processing (as in the PC-based computing environment) is very much obsolete in the case of UNIX computing. Using the network, it is also possible to break large processes into a number of smaller jobs and distribute them across multiple machines simultaneously, thereby reducing execution times dramatically. In a properly set-up UNIX LAN network, the storage of a users data on a remote machine, or their working on a remote machine should be a relatively transparent operation. Such concepts of networking are not confined to UNIX machines, although UNIX (in all its varieties) is far and away the most common from of operating system used for wide area networking.
Because a UNIX machine never stops processing, the are never switched off by anyone other than the system manager or a relevant member of staff. Simply switching off as you might with a PC can cause irreparable damage to a UNIX machine and/or the data stored on it - remember, your data/project could be on the disk you just killed, so don’t do it! If you think that there is something wrong with a machine, do not attempt to fix it yourself: call or email the system manager or ask a knowledgeable person for advice. Under no circumstances should you attempt to reboot a workstation yourself, as unless shut down properly damage to data, both yours and that of others is likely to result.
Many workstations you will come across have a simple power-saving device: the screen turns itself off if the keyboard hasn’t been used for a few minutes. To turn the screen back on, simply press a key on the keyboard such as shift, ctrl or the space bar. Often the monitor will have been turned off by the last user to save power (and to stop the lab heating up!) - in most cases, the monitors have a switch or button located on the lower right front of the monitor. If the monitor is on, a small green LED will light up. This is the only switch you should ever touch on the workstations. If it’s not on the front of the monitor, please leave it alone.
1.3.2 Accounts and passwords
passwd
The UNIX prompt is a sequence of characters that the part of the operating system (OS) that you interact with, known as the shell, places at the start of each line when it is expecting you to enter a command. Often this prompt will be formed by the name of the machine to which you are logged in, followed by a % sign. For instance:
which will indicate that you are logged on through a window (which you might call a terminal or a shell though these are subtly different things).
The nature of the prompt will vary from system to system, but the Geography machines have a prompt as above. When you become experienced you can customise the prompt to your own liking. The cursor (a small solid rectangle or underscore symbol) placed after the prompt tells you where your current typing position is (clicking in the window with the mouse doesn’t mover the cursor - it always remians at the end of the current line you’re on). The current line with the prompt is therefore known as the command line. Depending on the particular shell you are using and the sort of keyboard you have, you may be able to use up and down arrows to quickly go back through commands that you have typed at that prompt (in that shell session) (i.e. your history).
The first time you log in, you will be given a default password (this is the same for all students).
You should make sure that you change your password as soon as possible, but this needs to be something you will remember (as with all passwords) and secure enough that it can't easily be guessed. You could possibkly use the same password that you have for your ucl system account (or a variant of it). UCL will force you to change it every 3-6 months, so make sure youy also change your password on the system here. If you forget your password, you will need to see or email the system manager to get them to reset it (it is encrypted so they can't know what it is, but they can reset it).
To change your password, type passwd at the command prompt and follow the instructions:
1.3.3 Logging out
When you have finished your session at the computer, you must log off. To achieve this from a remote PC/Mac connection, simply type logout or exit at the prompt. From within a windowing session at the machine itself, select the logout option from your root menu (see the section on the windowing system for more details), and then confirm the logout by clicking on yes. If you leave yourself logged on then other people may come along and use your account, access your email etc. Whilst in a University environment this is not necessarily a problem - the next user will probably come along and log you out so that they can log on themselves it is important to log out so that other people don’t waste time wondering whether you have finished, or have just popped out for a few minutes. Don’t lock your workstation - this is anti-social behaviour as it prevents anyone else using it, and if we see it we’ll log you out anyway, and probably take all your pocket money away. If you leave for more than a few minutes, log yourself out. One of the advantages of a UNIX system is that you can leave a job running in the ‘background’ (don’t worry, we’ll get to that later) which means it’ll keep running for as long as you want even after you log out.
1.4 The UNIX file system
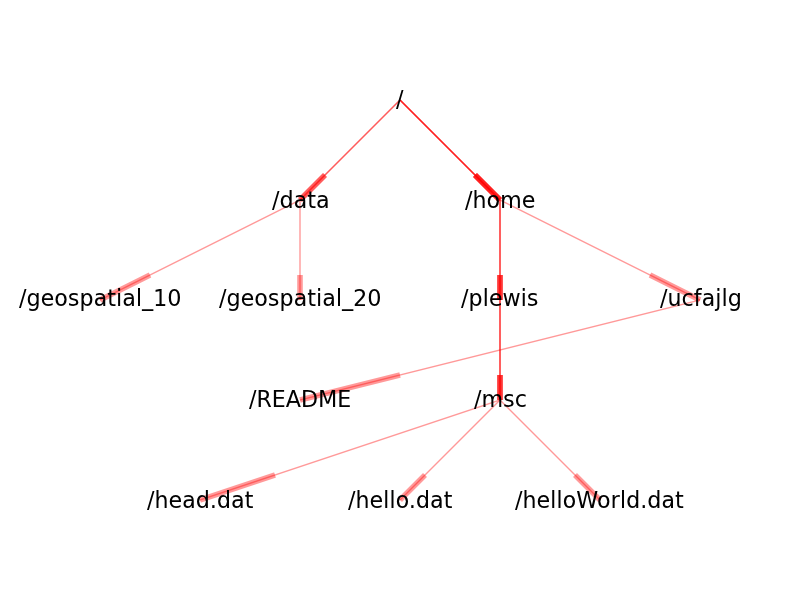
All information in UNIX, whether it is a program, data or text, is stored in files. These files are maintained by the operating system on hard disks (usually), and read into the computer’s memory when required. Files may be grouped together in directories (equivalent to folders), and these directories may themselves contain other directories and/or files. In fact, directories are really a special kind of file, but the user perceives the whole structure as forming a hierarchy of files and directories. This hierarchy is known as the filesystem. When UNIX computers are networked, the filesystem is not contained within one single machine, but spans the entire network. Each file and directory within the network filesystem is addressable via its own unique name - its filename, or directory name, and to the user the fact that the filesystem straddles multiple machines and hard disks goes largely unnoticed.
The filesystem may be visualised as the roots of a tree. At the very top level of the filesystem on each individual machine resides the root directory, denoted / (slash).
Beneath this directory lie the other directories containing files and further directories, including data and references to data stored elsewhere on the network.
1.4.1 Absolute and relative path names
dotdot
We have already mentioned that every file or directory in the filesystem is uniquely addressable by its filename or directory name. In fact a file’s full name is a description of the path from the root of the file system to the file itself. For instance, the directory plewis under the home directory has the full name:
Note that as well as being the root of the filesystem, / is also used as a directory separator for full filenames and paths (note that is the opposite of the Windows/DOS directory separator \). Here the directory plewis is reached by starting at the root of the system, /, going into the home directory. A directory contained within another directory is known as a sub-directory of its parent, or container, directory. The /home/ section of the full filename is known as the absolute path(name) to the file - absolute because it starts at the root of the system. With this nomenclature we are able to move around the filesystem.
Similarly, relative pathnames are permissible, describing the route to another path or directory from the current directory: the file country.dat in the directory /home/plewis may be addressed either absolutely as:
or relative to e.g. the directory /home/mdisney as:
where .. is a special symbol meaning ‘up one directory level’. An analogy is the address of your next door neighbour’s house. If you wanted to tell a friend what next door’s address is, you could give them the house number, the street, the city, the post code, and even the country. That’s the absolute path name to your neighbour’s house. Of course it’s much easier to specify “one house up from mine” or “number 18” etc. This is the relative path (relative to yours).
dot
Since .. (dot-dot) means 'up one level' in unix, we can also note at this point that the symbol . (dot) means 'the current directory', so:
would refer to a file called country.dat that is in the current directory.
1.5 Negotiating the file system
Each user in a UNIX network system has specific area of the filesystem belonging to them known as their home directory in which they are initially placed when they log on. Armed with a basic knowledge of the structure of the filesystem, each user is free to explore and visit almost any area of the system unless it has been specifically protected by its owner.
pwd
A good place to start is to be aware of where you are in the current shell.
When you opened your shell, you should normally be in your home directory, which will be something like /home/fbloggs on our system (if your username were fbloggs) (or on a mac, under OS X, it might be /Users/fbloggs).
The command to tell you where you are (in this shell) on the system is pwd (print working directory).
Try this for yourself now in a shell and confirm that this is the case. Make sure to hit the return key to execute the command.
pwd
u'/home/geogg122'
twiddle
The home directory is a special place ... it's the part of the system that you 'own' and have control over.
There is a special symbol in unix (formally, the tilde symbol ~, though we often call it twiddle). In 'unix speak' then we might refer to the home directory of the user plewis and 'twiddle plewis', which we would write as ~plewis.
If you want to refer to your own home directory, you can shortcut this to just 'twiddle', i.e. ~.
cd
So, we know how to find out where we are. How do we get somewhere else on the system?
To change your working directory to somewhere else, use the command cd (change directory).
Let's use that now (in a shell) to change our working directory to the root of the file system.
cd /
/
which will (once you hit the return key to execute the command) change your location, your ‘working directory’ to the root directory /.
A few things to pay attention to when first coming across this:
- first, there is space (‘white space’ as we call it) between the command cd and the ‘argument’
/. This is one or more spaces or tab characters so that the shell can understand that you want to run the command cd and give it some extra information (where to change directory to in this case), rather than, for example typingcd/in which case the shell will interpretcd/as the command you are trying to run; - second, if you think about what you want to achieve with the command, (change directory to somewhere) it should be quite apparent that apart from the command, you also need to give the shell an indication of where you want to go (
/here) so you (normally) will have to type cd somewhere where somewhere is where you want to go. When you are first using these commands, pausing and thinking about what you want to achive is particularly important. Later, it will generally become second nature (as when you learn any new language).
Now, if you type e.g.:
cd usr/bin
/usr/bin
You will change directory to the subdirectory bin of the subdirectory usr of /, which is the same as doing (using an absolute pathname):
cd /usr/bin
/usr/bin
These look similar at first glance, but the second importantly has a / at the front of the directory name, and so is an absolute pathname, whereas the first does not, so it is a relative pathname.
The idea should be simple and intuitive once you get the idea of / being a separator and / being the top of the directory tree (the root directory).
We can also practice using the symbol . (dot) at this point ... what does the following command do? (hint: check which directory you are in, run the command below, then chack again to see where you are).
cd .
/usr/bin
ls
The unix command to give a listing of files or directories is ls (list). e.g.:
cd /usr/local
/usr/local
ls
bin/       etc/     grads-2.0.2/  lib64/          MRTSwath/       share/
cuda@      exelis/  include/      libexec/        panoply-4.6.0/  src/
cuda-7.5/  games/   lib/          matlab_r2016a/  sbin/           xconv/
This tells us that in the system directory /usr/local/ there are (on this particular computer) a set of directories called bin, etc and so on.
We could have a look to see what is in those direcories e.g.:
ls /usr/local/share
acresso/ applications/ info/ macrovision/ man/
so we find some more sub-directories.
Note that just typing:
ls
bin/       etc/     grads-2.0.2/  lib64/          MRTSwath/       share/
cuda@      exelis/  include/      libexec/        panoply-4.6.0/  src/
cuda-7.5/  games/   lib/          matlab_r2016a/  sbin/           xconv/
has the same effect as typing:
ls .
bin/       etc/     grads-2.0.2/  lib64/          MRTSwath/       share/
cuda@      exelis/  include/      libexec/        panoply-4.6.0/  src/
cuda-7.5/  games/   lib/          matlab_r2016a/  sbin/           xconv/
1.6 Exercise Unix-1
- Change directory back to your home. Check where you are when you get there.
- Use an appropriate unix command to find out which files and directories you have in your home.
- Change directory to your neighbour's home (you will need to ask them their username). Check where you are when you get there, and see what files they have.
- Repeat these two exercises, (a) using
~; (b) using absolute pathnames; (c) using relative path names, perhaps throwing in the symbol.to make sure you understand that.
1.7 Summary
In this section, you have been introduced to the unix file system and some basic unix commands for navigation around the system.
commands in this section
2. Making and breaking things in Unix
2.0 In this section
In this section, you will be introduced to some new unix commands to create, copy, move and remove directories and files, as well as some concepts to start to give you more control of your environment.
[chmod] : change mode
[cp] : copy
[df] : disk free
[du] : disk usage
[ls -l] : long listing
[mkdir] : make directory
[mv] : move
[quota] : personal disk quota
[rm] : remove
[rmdir] : remove (empty) directory
[ssh] : secure shell
[*?] : wildcards
If you run through this exercise multiple times, you will probably want to delete the directories ~/DATA/bar, ~/DATA/foo and ~/DATA/testCp and their contents before starting:
rm -rf ~/DATA/foo
rm -rf ~/DATA/testCp
rm -rf ~/DATA/bar
2.1 Making and removing directories
mkdir
The command mkdir (make directory) is used to create ('make') a directory. You will want to do this to organise your files (e.g. put all of the files for a practical in one place).
In the unix system you have here, there is (should be) a data directory (called Data or DATA). This is a large storage disk that you can use to put large exercises and data. Note that this disk is not so regularly backed up as your home directory, but it is much larger (and does not have a quota, as your home area does).
Lets first move to the data directory:
cd ~/DATA
/data/store01/data_dirs/staff/geogg122
and check where we are:
pwd
u'/data/store01/data_dirs/staff/geogg122'
Now let's create a directory that we might call foo, and move (i.e. change directory) into it:
mkdir foo
cd foo
/data/store01/data_dirs/staff/geogg122/foo
or alternatively, to go straight there:
cd ~/DATA/foo
/data/store01/data_dirs/staff/geogg122/foo
ls
There should be no files in this new directory, so ls will tell us that.
It is instructive to see what happens if we try to create a directory that already exists:
mkdir ~/DATA/foo
mkdir: cannot create directory ‘/home/geogg122/DATA/foo’: File exists
So, the command complains that the file already exists.
If we want to avoid this behaviour and create it is it doesn't exist or just leave it if it already does, we can use the command line option -p for mkdir:
mkdir -p ~/DATA/foo
Command line options (that are normally preceeded by a - character or -- in some cases) change the behaviour of a command.
rmdir
Now suppose we don't want the directory any more.
To remove an empty directory, we use the command rmdir (remove directory).
Its not a good idea to try to remove the directory we are in, so let's cd home first:
cd ~
/home/geogg122
rmdir ~/DATA/foo
ls ~/DATA
/home/geogg122/DATA@
Using the command ls we should be able to confirm that the directory has gone.
Again, it is instructive to see what happens if things 'go wrong', so let's create a directory that is not empty, and try to use rmdir to delete it:
mkdir -p ~/DATA/foo/bar
We can see that another use of the -p option in mkdir is to allow us to create a hierarchy of directories at one shot, so now, in the directory ~/DATA/foo we have a sub-directory `~/DATA/foo/bar':
ls ~/DATA/foo
bar/
rmdir ~/DATA/foo
rmdir: failed to remove ‘/home/geogg122/DATA/foo’: Directory not empty
So, rmdir complains that the directory is not empty, and so doesn't delete it. We will see below that we use another command in this case.
2.2 Wildcards
Very often, we don't want to have to refer to the full file or directory name. Equally, we might often want to refer to multiple filenames or directories.
To do this in unix, we use wildcards. The wildcard symbols are: * and ?.
* is interpreted as zero or more characters
? is a single (wildcard) character
We use these to form patterns of filenames.
So, if we wanted to get a listing of all of the files in the directory ~plewis/msc that end with the suffix .dat we would type:
ls ~plewis/msc/*.dat
/home/plewis/msc/atm.dat      /home/plewis/msc/helloWorld.dat
/home/plewis/msc/country.dat  /home/plewis/msc/landsat.dat
/home/plewis/msc/dem.dat      /home/plewis/msc/listing.dat
/home/plewis/msc/forest.dat   /home/plewis/msc/max.dat
/home/plewis/msc/head.dat     /home/plewis/msc/points.dat
/home/plewis/msc/header.dat   /home/plewis/msc/popden.dat
/home/plewis/msc/hello.dat
ls ~plewis/*/l*.dat
/home/plewis/geog/log.dat                  /home/plewis/msc/landsat.dat
/home/plewis/harwood/lookAngles.dat        /home/plewis/msc/listing.dat
/home/plewis/home/log.dat                  /home/plewis/plewis/log.dat
/home/plewis/krugerSims/light.default.dat  /home/plewis/p/log.dat
/home/plewis/krugerSims/light.lidar.dat    /home/plewis/public_html/log.dat
ls ~plewis/m??/l*n?.dat
/home/plewis/msc/listing.dat
2.3 Copying, moving and deleting files
cp
The command for copying a file is cp (copy), e.g.:
mkdir -p ~/DATA/foo
cp -n ~plewis/msc/hello.dat ~/DATA/foo
First, we created the directory ~/Data/foo, then we used the command cp to copy a file from ~plewis/msc/hello.dat to the directory ~/DATA/foo.
Usually you will be able to simply type:
cp ~plewis/msc/hello.dat ~/DATA/foo
i.e. without the -n option we have put here, but on some systems / setups you will find that cp might complain if one or more of the files you are trying to copy to already exist (this is a safety mechanism to stop you overwriting something you might not have meant to!).
The -n option makes cp copy the files, but not overwrite an existing file.
Note that if cp detects an attempt to copy a file to itself, the copy will fail.
Check that the file has been correctly copied using an appropriate command.
Note the whitespace between the command cp and the two arguments ~plewis/msc/hello.dat and ~/Data/foo, as well as the use of the -n option here.
A common mistake people make when first using this command is not giving two (actually, two or more) arguments, but if you think about what information you would need to give to the computer to copy a file from somewhere to somewhere else, you will soon learn that you need at least two arguments.
We can copy more than one file at a time using wildcard characters.
To explore this, lets get a listing of all of the files that end with .dat but start with h in the directory ~plewis/msc:
ls ~plewis/msc/h*.dat
/home/plewis/msc/head.dat    /home/plewis/msc/hello.dat
/home/plewis/msc/header.dat  /home/plewis/msc/helloWorld.dat
To copy multiple files to the same place then, we could simply list the names:
cp -n ~plewis/msc/hello.dat ~plewis/msc/helloWorld.dat ~/DATA/foo
In this case, the command has three arguments. The final argument (~/DATA/foo) is interpreted as the place we want to copy the files to, and everything before that is a list of files we want to copy there
If we knew we'd want all of the files h*.dat, then we can more simply type:
cp -n ~plewis/msc/h*.dat ~/DATA/foo
Again, after you have done this, check to see what files are in the directory ~/DATA/foo.
ls ~/DATA/foo
bar/ head.dat header.dat hello.dat helloWorld.dat
You can use the option -R to do a recursive copy, i.e. copy a directory and everything below it, e.g.:
mkdir -p ~/DATA/testCp
cp -Rf ~plewis/msc ~/DATA/testCp
ls ~/DATA/testCp
msc@
ls ~/DATA/testCp/msc
/home/geogg122/DATA/testCp/msc@
rm
The command rm (remove) is used to remove (delete) a file. For new users, we normally set the default behaviour of this (through something called an alias) to rm -i which then prompts the user about whether they really wanted to delete that file.
The opposite of this (i.e. force a delete) is rm -f that we will illustrate here.
rm -f ~/DATA/foo/header.dat
ls ~/DATA/foo
bar/ head.dat hello.dat helloWorld.dat
so we see the file has gone from that directory.
Normally, especially when you are just starting to use unix, you should probably avoid using the -f option to rm.
As an exercise, use rm and wildcards to delete all of the files in ~/DATA/foo that start with hel and end in .dat, and confirm that what you wanted to happen actually has.
rm -f ~/DATA/foo/hel*.dat
ls ~/DATA/foo
bar/ head.dat
You can use the option -R to make rm do a hierarchical ('recursive') deletion, e.g. delete everything from some directory downwards.
This can be rather a dangerous command to use, as you might (if you are not careful) delete everything on your system, but of course it is of great practical use.
But we will use it here to delete the directory ~/DATA/foo and all of its contents.
rm -Rf ~/DATA/foo
ls ~/DATA/
Downloads/  geogg122.20161004/  testCp/
geogg122/   geogg122.tar.Z      UCL_Kubuntu.ova
so now its gone.
mv
If we want to move files or directories or rename them, then you should use the mv (move) command.
Let's make a new directories ~/DATA/bar, ~/DATA/foo and copy some files into ~/DATA/bar:
mkdir -p ~/DATA/bar ~/DATA/foo
cp -n ~plewis/msc/h*dat ~/DATA/bar
You should check that the files you expect to see in ~/DATA/bar are there:
ls ~/DATA/bar
head.dat header.dat hello.dat helloWorld.dat
Now, let's move the files hello.dat and helloWorld.dat into a directory ~/DATA/foo (using wildcards):
mv -n ~/DATA/bar/hello*dat ~/DATA/foo
ls ~/DATA/bar ~/DATA/foo
/home/geogg122/DATA/bar:
head.dat  header.dat

/home/geogg122/DATA/foo:
hello.dat  helloWorld.dat
To use mv to rename a file is in effect the same as moving it to a file of a different name:
mv ~/DATA/bar/head.dat ~/DATA/bar/tail.dat
ls ~/DATA/bar
header.dat tail.dat
2.4 Getting more control
You should now have some understanding of the main unix commands for dealing with directories and files.
We will now introduce a few concepts that give you more control over what you are doing on the system.
NOTE: Although in the examples above, we have been able to type some basic system commands into the python, we can't do this for some of the commands we will use below. A more general interface to unix (shell) commands from a python prompt involves putting an exclamation mark (!, known as 'bang') in front of the command. In these notes then, where you see bang (!) in front of a command, you leave that out when using the command at the unix prompt. e.g.:
!ls ~/DATA/foo
hello.dat helloWorld.dat
You can also run shell commands by invoking the bash shell:
%%bash
ls ~/DATA/foo
hello.dat
helloWorld.dat
quota
We mentioned above that your home directories have a quota associated with them. This means that when you try to go over that quota, you will no longer be able to write to your home area.
This can be a cause of confusion with new students, in particular because when you log into to a windowing session on the unix computers, several files tend to be written to your user area on startup. So, if you are over your quota, you will find that your attempt to login fails. This can be confusing because you may just imagine that the system is 'broken', or perhaps you have typed the wrong password. These are things that can happen of course, but by far the most common reason for your being unable to log in to a windowing session (and probably somethiong that will happen to most of you at some point over the year) is that you have gone over your quota.
The unix command to check your quota is, helpfully, quota, though you would usually use the -v option:
%%bash
quota -v
Disk quotas for user geogg122 (uid 4112):
     Filesystem  blocks   quota   limit   grace   files   quota   limit   grace
disco:/RAID_I/rsu_raid_0
                      0       0       0               0       0       0
If you happen to be on a system where no quota is set (e.g. your own computer), this command will tell you that.
ssh
That's all very well to be able to find out if you are over your quota, but how can you do that if you can't log in?
Well, in that case, you need to find another terminal somewhere (e.g. 'borrow' a window on another user's display, with their permission) and you can check it from there.
One way to do this is to use the command ssh which you can use to spawn a process on a remote machine.
For example, you have tried to log in to a computer called berlin.geog.ucl.ac.uk but the login fails. You then go to a friend who is logged in to another computer and ask if you can check your quota from there. You open a new terminal, and use ssh (secure shell):
ssh plewis@berlin.geog.ucl.ac.uk "quota -v"
which will then prompt you for your password and return the result of running the command quota -v on the computer berlin.geog.ucl.ac.uk as the user plewis (obviously, you replace plewis by your user name).
Alternatively, if you just type:
ssh plewis@berlin.geog.ucl.ac.uk
Then this will start an interactive session as the user plewis (or rather, your username) on that computer and you should then be able to check your quota and fix any issues you have.
We will see some further use of ssh later on, but knowing that you can use it to run a remote process is very useful.
df
If you are using large datasets (that you may easily be doing in remote sensing), then you should have some awareness of how much space there is on the disk. If a disk gets full or nearly full, and you attempt to write to it, you may get unexpected results. You may also waste a lot of time.
The command df (disk free) will also tell you how much disk space there is, and how much is used. It is generally of value to use the -h option that gives the results in 'human readable' form e.g.:
%%bash
df -h ~/DATA
Filesystem      Size  Used Avail Use% Mounted on
store01:/store   22T   22T  545G  98% /data/store01
The output of this command is also of value to you if you need to know the actual device name of some disk area. For example, what you see on the file system as e.g. ~/DATA may be physically on a device called /dev/disk0s2. Mostly, you won't need to know that level of detail about the system, but occasionally, and as you become more expert in using unix, you will so it is good to have these things at the back of your mind.
du
To check how much disk space you are using, use the command du (disk usage). Often, you would use this with the option -s which produces a summary. Again, it is often of value to use the -h option that gives the results in 'human readable' form e.g.:
%%bash
du -sh ~/DATA
0 /home/geogg122/DATA
This summary disk usage information tells us (here in human readbale form) how much disk space is used in the directory ~/DATA and its subdirectories.
ls -l
We have come across the command ls earlier as the command to give a listing of directory contents.
A useful option for the command ls that gives you a long (verbose) listing of files or directories is ls -l (long listing).
We will first make move the directory ~/DATA/bar into the directory ~/DATA/foo, then look at a long listing of what there is in ~/DATA/foo:
%%bash
mv ~/DATA/bar ~/DATA/foo
ls -l ~/DATA/foo
total 8
drwxr-xr-x. 2 geogg122 Group_2015 38 Oct  5 08:34 bar
-rw-r--r--. 1 geogg122 Group_2015 14 Oct  5 08:34 hello.dat
-rw-r--r--. 1 geogg122 Group_2015 13 Oct  5 08:34 helloWorld.dat
The long listing displays information on the owner of a file (plewis here), the size of the file (e.g. ~/DATA/foo/hello.dat is 14 bytes), and when it was last modified (26 Sep 17:05). The first field that you see (e.g. drwxr-xr-x) is a series of codes that tells you about what type of file it is (d in the first element means that it is a directory) then there are three sets of three elements that may be set to rwx or unset as in ---. These refer to read r, write w and execute x permissions for this file (or directory), so that if you see e.g. rw- that means that read and write permission are set but not execute. Note that directories have the x bit set if you are to be able to see into that directory, but you will not generally alter that.
The three groupings refer to user u, group g and other o.
A useful additional option to ls is the -h option, that gives file sizes in 'human readable' format (i.e. something easier to understand):
%%bash
ls -lh ~/DATA/foo
total 8.0K
drwxr-xr-x. 2 geogg122 Group_2015 38 Oct  5 08:34 bar
-rw-r--r--. 1 geogg122 Group_2015 14 Oct  5 08:34 hello.dat
-rw-r--r--. 1 geogg122 Group_2015 13 Oct  5 08:34 helloWorld.dat
where the B at the end of the size field tells us the size is in bytes (or K for Kilobytes, M for Megabytes, G for Gigabytes etc).
chmod
So, using ls -l give us information on what the file (/directory) permissions are. By default this will tend to be a sensible but open -rw-r--r-- for files, i.e. read permission for the user, groups and the rest of the world but only write permission for the user themselves. For directories, the default is generally similar, but the x bit is set as well.
We can manipulate the file permission settings, e.g. to remove read permission for some secure piece of work we are doing, or to open up write permission for other users on some shared piece of work, using the command chmod (change mode).
If you have followed the material above, you should have a file called hello.dat in the directory ~/DATA/foo (check that this is the case) and we will make a new sub-directory in there called foobar from which we will remove all write permissions.
%%bash
mkdir -p ~/DATA/foo/foobar
ls -l ~/DATA/foo
chmod uog-w ~/DATA/foo/foobar
ls -l ~/DATA/foo
total 8
drwxr-xr-x. 2 geogg122 Group_2015 38 Oct  5 08:34 bar
drwxr-xr-x. 2 geogg122 Group_2015  6 Oct  5 08:35 foobar
-rw-r--r--. 1 geogg122 Group_2015 14 Oct  5 08:34 hello.dat
-rw-r--r--. 1 geogg122 Group_2015 13 Oct  5 08:34 helloWorld.dat
total 8
drwxr-xr-x. 2 geogg122 Group_2015 38 Oct  5 08:34 bar
dr-xr-xr-x. 2 geogg122 Group_2015  6 Oct  5 08:35 foobar
-rw-r--r--. 1 geogg122 Group_2015 14 Oct  5 08:34 hello.dat
-rw-r--r--. 1 geogg122 Group_2015 13 Oct  5 08:34 helloWorld.dat
From which we see that the w bit on the directory ~/DATA/foo/foobar has been removed (unset). The uog part refers to user, group and other. The - part means remove and the w part refers to the write bit.
So, if we now try to copy or move a file into the bar directory, we would expect it to fail:
%%bash
cp -f ~/DATA/foo/hello.dat ~/DATA/foo/foobar
cp: cannot create regular file ‘/home/geogg122/DATA/foo/foobar/hello.dat’: Permission denied
2.5 Exercise
Go through the notes above, making sure you understand how to create and remove files and directories and how to move around the file system. That is the minimum you will need to start with. When you are doing this, don't just blindly type the commands given above, vary the file and directory names and make sure you appreciate what each command you type is doing (otherwise you won't learn this, I'm afraid).
You should pay some attention to the notes on quota and related disk space/usage commands, as it is really quite likely that you will hit such problems at some time in the year, and you really ought to be able to fix such problems yourself. Remember, if you can't log on, the most likely reasons are: (i) you typed something wrong (so, check carefully); (ii) if you can't get in at the desktop, then probably you have gone over your quota. The most likely reason for going over quota is that you have put too many large files in your home area, instead of putting them in your DATA area as you are supposed to. To fix that, log in as given above and delete the files from your home area until you are below quota, or (better) move them into the DATA area (or better still, put them in the DATA area in the first place and avoid this problem).
2.6 Summary
In this section, you should have learned how to deal with copying, moving files and directories and related issues such as file permissions. You should also have gained some understanding of how to control what is going on in the unix environment a little more.
Commands in this section
[chmod] : change mode
[cp] : copy
[df] : disk free
[du] : disk usage
[ls -l] : long listing
[mkdir] : make directory
[mv] : move
[quota] : personal disk quota
[rm] : remove
[rmdir] : remove (empty) directory
[ssh] : secure shell
[*?] : wildcards
3. Some more Unix and associated tools
3.1 UNIX Command Structure, Data Flow and File Manipulation
The previous sections dealt with the basic tools of Unix. Now, we will look at a few useful tools you have access to and some slightly more advanced concepts that again enable you to do more with the computer.
Before starting this section, let's create a directory in your DATA area called unix:
%%bash
mkdir -p ~/DATA/unix
Remember that commands below that start with ! (bang) should not have this symbol when you type them at the unix prompt: it is only because we are going through a python interpreter in these notes.
3.1.1 Data Flow : stdin and stdout
streams
Within unix all information is stored in files. Programs are 'told' (by the operating system) to read from and write to these files either by redirecting their input and output, or by modifying their action through the use of command line arguments or options. The channels through which the data flows to or from are known as streams.
In the special case where data flows directly from one program into another, these channels are known as pipes.
By default, with no options or arguments to specify otherwise, most commands will read their input form the keyboard and write their output to the screen. The data channels which attach the keyboard and the screen to the program are known as the standard input (stdin) and the standard output (stdout) respectively.
Stdin and stdout can be redirected to and from files rather than the keyboard or screen using the unix < (“read from") and > (“write to”) symbols.
echo
The shell command echo will display text that you type after the command in the terminal (by default), e.g.:
%%bash
echo "my home is $HOME and my name is $USER"
my home is /home/geogg122 and my name is geogg122
Here, HOME is an environment variable that is passed through to programs to give contextual information about a users's environment (i.e. how things are set up).
USER is another environment variable that gives your username ('login' or 'account' name).
In unix shells, we refer to the value of an environment variable with a $ symbol. Environment variables tend to be in upper case (capital letters) whereas another type of variable, shell variables (that refer only to a particular shell) are in lower case (small letters).
Often, we would put quotes around the text:
%%bash
echo "hello world $USER"
hello world geogg122
This makes it a bit neater to see what we are doing, but is not strictly necessary in this case.
There are different quotes that we use in unix. The double quote " allows shell variables to be interpreted in the string enclosed by the quotes, but a single quote ' does not.
%%bash
echo 'hello world $USER'
hello world $USER
stdout
So, when we use the unix command echo, the result of running that command appears in the terminal we are using.
In fact, it is directed to the standard output channel stdout, which allows us to redirect it, e.g. to a file:
%%bash
echo "hello world" > ~/DATA/unix/hello.dat
Now, nothing should have appeared in the terminal ... the text resulting from the echo command went instead to the file ~/DATA/unix/hello.dat.
We can check to see how big this file is to see if that makes sense:
%%bash
ls -lh ~/DATA/unix/hello.dat
-rw-r--r--. 1 geogg122 Group_2015 12 Oct 5 08:35 /home/geogg122/DATA/unix/hello.dat
We see that the file exists and is of size 12 bytes.
wc
We could count up the number of characters in "hello world" and see that it has 11 (including the space). We might infer from that that the file representation uses 1 byte per character for text, which is in fact the case. The encoding used is normally the ASCII character set.
Why is the file 12 bytes though? The answer is that there is an additional character at the end of the file that tells the operating system that this is the end of the file. Not surprisingly, this is called the end of file marker or more properly, end of transmission EOT. This is represented as by the character ^D (control D) in the ASCII character set.
Sometimes it's too much effort to count up the characters in a string or a file. In unix, we can use the command wc (word count):
%%bash
wc < ~/DATA/unix/hello.dat
1 2 12
By default, this displays the number of lines (1 here), words (2 here) and bytes (12 here) in the file.
Useful modifcations of behaviour are e.g.:
%%bash
wc -l < ~/DATA/unix/hello.dat
1
which reports only the number of lines (similarly wc -w for words or wc -c for characters).
stdin
You may have noticed that we used the stdin symbol < here, which redirects the contents of the file ~/DATA/unix/hello.dat into the command wc.
pipe
One powerful concept in unix is the idea of pipes. This allows us to take the stdout resulting from one program and direct it to the stdin of another.
This means we can e.g. avoid writing files out where all we want to do with the information is to pass it to another program.
So, for the examples above, we could write:
%%bash
echo "hello world" | wc -c
12
where | is the pipe symbol.
sed
This sort of idea is very useful if a sequence of programs (unix commands) that you want to run essentially work as 'filters'.
The command sed (stream editor) can be very useful in this regard for dealing with text. The syntax of sed can be a little awkward for users to begin with, but we will just show a few examples here.
%%bash
echo "welcome $USER to using a computer"
echo "welcome $USER to using a computer" | sed 's/a computer/unix/'
welcome geogg122 to using a computer
welcome geogg122 to using unix
The s part of the sed command means 'substitute'. It then changes an occurrence of the string a computer into the string unix.
If you wanted to change all occurrences of the string, use a g at the end, e.g.:
%%bash
echo "welcome $USER to using a computer. How do you like using a computer?" | sed 's/a computer/unix/'
echo "welcome $USER to using a computer. How do you like using a computer?" | sed 's/a computer/unix/g'
welcome geogg122 to using unix. How do you like using a computer?
welcome geogg122 to using unix. How do you like using unix?
awk
You are not limited to a single pipe of course, but can pipe through multiple commands.
To illustrate this, we introduce a new command awk that is a pattern scanning and interpretation language. You can use awk (or variants such as nawk or gawk) for many things but it is particularly useful for doing operations on columns of text or data that are in ASCII (i.e. text) format. For example:
%%bash
echo "1 2 3 4 5" | awk '{print $1+$3}'
4
will output the sum of numbers in columns 1 and 3. To use it below, we can note here that the term $0 refers to the complete input string and that there is a reasonably rich syntax for performing operations on columsn of data.
%%bash
echo "1 2 3 4 5"
echo "1 2 3 4 5" | awk '{for(i=1;i<=NF;i++)sum+=$i} END{print "the sum is",sum}'
echo "1 2 3 4 5" | sed 's/1/one/'
echo "1 2 3 4 5" | sed 's/1/one/' | sed 's/2/two/' | sed 's/3/three/' | sed 's/4/four/' \
                         | sed 's/5/five/' | awk '{print $0 ", once I caught a fish alive"}'
1 2 3 4 5
the sum is 15
one 2 3 4 5
one two three four five, once I caught a fish alive
cat
The unix command cat (concatenate) is used for a variety of purposes, but normally you will use it to concatenate (join together) files.
If you specify a filename as - then the information of stdin is used, e.g.:
%%bash
echo "hello" | cat -
hello
Let's create some files of one line and join them together.
%%bash
echo "hello $USER" > ~/DATA/unix/hello.dat
echo "welcome to the world of unix" > ~/DATA/unix/hello2.dat
date
%%bash
date | cat - ~/DATA/unix/hello.dat ~/DATA/unix/hello2.dat
Wed  5 Oct 08:35:46 BST 2016
hello geogg122
welcome to the world of unix
Here, we ran the command date that prints the current date (time) to stdout, concatenated the files ~/DATA/unix/hello.dat and ~/DATA/unix/hello2.dat to the end of this and sent the result to stdout (the terminal).
If we wanted to send this to another file, we would simply redirect the output:
%%bash
date | cat - ~/DATA/unix/hello.dat ~/DATA/unix/hello2.dat > ~/DATA/unix/helloWorld.dat
We can also use the command cat to simply put the contents of its stdin channel to stdout, which is one way to display the contents of an ASCII file at the terminal.
%%bash
cat < ~/DATA/unix/helloWorld.dat
Wed  5 Oct 08:35:52 BST 2016
hello geogg122
welcome to the world of unix
appending
When we redirect stdout using the > symbol, this will create a file if it doesn't already exist, but will overwrite one if it does exist:
%%bash
echo "Now you see me" > ~/DATA/unix/test.dat
cat ~/DATA/unix/test.dat
echo "now you don't" > ~/DATA/unix/test.dat
cat ~/DATA/unix/test.dat
Now you see me
now you don't
If you want to append to a file, rather than writing over the contents, you can use the >> symbol:
%%bash
echo "Now you see me" > ~/DATA/unix/test.dat
echo "now you still see me" >> ~/DATA/unix/test.dat
cat ~/DATA/unix/test.dat
Now you see me
now you still see me
and you can continue adding lines in this way:
%%bash
echo "ad nauseam" >> ~/DATA/unix/test.dat
cat ~/DATA/unix/test.dat
Now you see me
now you still see me
ad nauseam
more
If the text file you are looking at has a lot of lines, it can scroll off the screen, which can be a bit frustrating.
The unix command more lets you view a file one page at a time.
First, let's create a long file:
%%bash
echo "this is the start of file" > ~/DATA/unix/test2.dat
cat ~/DATA/unix/test.dat >> ~/DATA/unix/test2.dat
cat ~/DATA/unix/test.dat >> ~/DATA/unix/test2.dat
cat ~/DATA/unix/test.dat >> ~/DATA/unix/test2.dat
cat ~/DATA/unix/test.dat >> ~/DATA/unix/test2.dat
cat ~/DATA/unix/test.dat >> ~/DATA/unix/test2.dat
cat ~/DATA/unix/test.dat >> ~/DATA/unix/test2.dat
cat ~/DATA/unix/test.dat >> ~/DATA/unix/test2.dat
cat ~/DATA/unix/test.dat >> ~/DATA/unix/test2.dat
cat ~/DATA/unix/test.dat >> ~/DATA/unix/test2.dat
cat ~/DATA/unix/test.dat >> ~/DATA/unix/test2.dat
cat ~/DATA/unix/test.dat >> ~/DATA/unix/test2.dat
cat ~/DATA/unix/test.dat >> ~/DATA/unix/test2.dat
cat ~/DATA/unix/test.dat >> ~/DATA/unix/test2.dat
cat ~/DATA/unix/test.dat >> ~/DATA/unix/test2.dat
cat ~/DATA/unix/test.dat >> ~/DATA/unix/test2.dat
cat ~/DATA/unix/test.dat >> ~/DATA/unix/test2.dat
cat ~/DATA/unix/test.dat >> ~/DATA/unix/test2.dat
cat ~/DATA/unix/test.dat >> ~/DATA/unix/test2.dat

echo "this is the end of file" >> ~/DATA/unix/test2.dat
cat ~/DATA/unix/test2.dat
this is the start of file
Now you see me
now you still see me
ad nauseam
Now you see me
now you still see me
ad nauseam
Now you see me
now you still see me
ad nauseam
Now you see me
now you still see me
ad nauseam
Now you see me
now you still see me
ad nauseam
Now you see me
now you still see me
ad nauseam
Now you see me
now you still see me
ad nauseam
Now you see me
now you still see me
ad nauseam
Now you see me
now you still see me
ad nauseam
Now you see me
now you still see me
ad nauseam
Now you see me
now you still see me
ad nauseam
Now you see me
now you still see me
ad nauseam
Now you see me
now you still see me
ad nauseam
Now you see me
now you still see me
ad nauseam
Now you see me
now you still see me
ad nauseam
Now you see me
now you still see me
ad nauseam
Now you see me
now you still see me
ad nauseam
Now you see me
now you still see me
ad nauseam
this is the end of file
This is probably long enough to scroll off your terminal.
Instead of using cat to view such a file, use more.
You can use the space bar to go down one page at a time, or return for a line at a time (also b to go back, :3 to go to line 3, /end to search for the string end, etc.)
%%bash
more ~/DATA/unix/test2.dat
::::::::::::::
/home/geogg122/DATA/unix/test2.dat
::::::::::::::
this is the start of file
Now you see me
now you still see me
ad nauseam
Now you see me
now you still see me
ad nauseam
Now you see me
now you still see me
ad nauseam
Now you see me
now you still see me
ad nauseam
Now you see me
now you still see me
ad nauseam
Now you see me
now you still see me
ad nauseam
Now you see me
now you still see me
ad nauseam
Now you see me
now you still see me
ad nauseam
Now you see me
now you still see me
ad nauseam
Now you see me
now you still see me
ad nauseam
Now you see me
now you still see me
ad nauseam
Now you see me
now you still see me
ad nauseam
Now you see me
now you still see me
ad nauseam
Now you see me
now you still see me
ad nauseam
Now you see me
now you still see me
ad nauseam
Now you see me
now you still see me
ad nauseam
Now you see me
now you still see me
ad nauseam
Now you see me
now you still see me
ad nauseam
this is the end of file
less
In some ways better that more is less. Try that on the file now.
%%bash
less ~/DATA/unix/test2.dat
this is the start of file
Now you see me
now you still see me
ad nauseam
Now you see me
now you still see me
ad nauseam
Now you see me
now you still see me
ad nauseam
Now you see me
now you still see me
ad nauseam
Now you see me
now you still see me
ad nauseam
Now you see me
now you still see me
ad nauseam
Now you see me
now you still see me
ad nauseam
Now you see me
now you still see me
ad nauseam
Now you see me
now you still see me
ad nauseam
Now you see me
now you still see me
ad nauseam
Now you see me
now you still see me
ad nauseam
Now you see me
now you still see me
ad nauseam
Now you see me
now you still see me
ad nauseam
Now you see me
now you still see me
ad nauseam
Now you see me
now you still see me
ad nauseam
Now you see me
now you still see me
ad nauseam
Now you see me
now you still see me
ad nauseam
Now you see me
now you still see me
ad nauseam
this is the end of file
grep
Another very useful utility is grep ('globally search a regular expression and print'). You will commonly use this to find lines in a file that match some pattern. E.g.:
%%bash
grep see < ~/DATA/unix/test.dat
Now you see me
now you still see me
We told grep to return (i.e. put on stdout) lines of input that contain the string see in this case.
By default, the pattern we search for is case sensitive (so, Now is different from now).
We can use the -v option to ignore the case (i.e. whether it is lower case or upper case):
%%bash
grep now < ~/DATA/unix/test.dat
now you still see me
%%bash
grep -i now < ~/DATA/unix/test.dat
Now you see me
now you still see me
Usefully, we can also return lines that don't match the pattern using the -v option:
%%bash
grep -v see < ~/DATA/unix/test.dat
ad nauseam
stderr
Some commands make use of the stderr channel for reporting information to the shell (or e.g. a log file) whilst not interfering with information going to stdout.
To redirect the stderr channel to a file, use >& in csh or tcsh but 2> in bash and similar shells.
3.2 Creating and editing text files
3.2.1 Creating text files with cat
A common thing you will want to do is create or edit a text file (ASCII text file).
We have seen that you can redirect the standard output of unix commands to a file, so if the commands output ASCII, this is obviously one way you can create a file.
We have also mentioned that the default input for stdin is what you type at the keyboard, so we can use that to create some text in a file.
We can use the command cat for this.
If you type cat at the prompt:
%berlin cat
then what you type after that will be read into cat and sent to stdout.
Try that now.
To end the input (end the file) we type a ^D character (the control and D keys together).
for example, type or copy and paste some text such as:
%berlin
Gallia est omnis divisa in partes tres; unam
partem incolunt Belgae, aliam Aquitani, tertiam
qui ipsorum lingua Celtae, nostra Galli, appellantur.
^D  ```

You should find that the lines you type are 'echoed' to the terminal when you hit `return` at the end of each line. This is because you are sending information to `cat` from the keyboard (visualised in the terminal so you can see what you are typing) on `stdin` and the output is also going to the terminal on `stdout`.

If you wanted to type information that will go into a file, you can redirect the output of `cat` to a file:

```%berlin cat > ~/DATA/unix/gettysburg.dat
The world will little note,
nor long remember what we say here,
but it can never forget what they did here.
^D  ```

This will now be stored in the file `~/DATA/unix/gettysburg.dat`.

That's all very well, and often you will use this methbod to create some text in a file, but if you make a mistake, you will find that you can't easily edit it, which can be rather inconvenient.
3.2.2 text editing
There are many text editors available for unix, and what you use day-to-day will depend a lot on personal preferences.
A short tutorial introducing some of these is available here.
Most of these will open a new 'window', which will then have buttons and menus and other convenient gizmos, much like a word processor. Although you obviously can type and process words in such tools, you should remember that these are not really the same as word processors as the aim is to type and manipulate text represented as ASCII characters (i.e. not in MS word or rtf format or whatever). That said, some texteditors can store files in formats other than ASCII (e.g. rtf), and also some word processing formats are simply ASCII text representations.
vi
In these notes and the associated lecture, we will introduce you to one of the most basic unix text editors, vi (which is similar to its varaint vim that you will sometimes come across).
Whilst there is some learning overhead on this, two very good reasons for knowing the bare bones of this are:
- it is available on any unix system
- you use it through a terminal, so it doesn't require any windowing system
This latter point could become important to you e.g. if you had broken or corrupted your unix installation or e.g. if you were working remotely over a connection that was slow.
It is worthwhile then learning these basics,but you can also follow a good short tutorial on this called vi for smarties.
vi commands
:w - write
:q - quit
:w somethingElse.dat - write to file somethingElse.dat
:wq - write and quit
:q! - force quit (without saving)
:u - undo
:100 - go to line 100 (etc)
escape (and general panic button)
ESC - exit insert mode (escape key)
navigation (or use arrow keys)
h - left
j - down
k - up
l - right
other
/ - search for (regular expression), e.g. /here
n - next (regular expression)
insert/delete
i - insert (before). N.B. puts you into insert mode, until you hit ESC.
a - insert (after) (i.e. append) N.B. puts you into insert mode, until you hit ESC.
x - delete current character
10x - delete next 10 characters (etc.)
dw - delete word (so, 10dw etc)
dd - delete line (do 10dd etc.)
J - delete end of line (so bring next line up)
3.2.3 Exercise
Use vi now to edit a file you have created, e.g.
berlin% vi ~/DATA/unix/gettysburg.dat
Practice adding some more lines, changing the words etc., and save your edited file to ~/DATA/unix/myGettysburg.dat
3.3 Process control
3.3.1 Foreground and background
foreground
When you start a process that opens another window, you may have noticed that no prompt was returned and that any subsequent typing in the parent window was ignored until you exited the command (or it finished some other way). This was because tool you started has taken over input to and output from the parent window, or more accurately, the shell running the window. In this state the program you started is said to be running in the foreground - that is no further processes can be started from that window/shell until textedit relinquishes control.
As an example, try:
berlin% display ~plewis/msc/sar.jpg
This should open a window on your computer and display a SAR image (of Barton Bendish in Norfolk).

The problem you will find is that if you go back to the terminal you ran the command from, you will now longer be able to run any other commands.
Try typing ls for example, your terminal will seem to be 'stuck':
berlin% display ~plewis/msc/sar.jpg ls
The reason for this is that the terminal will not accept any further commands until you quit the current process (or job, we might call it), which is xv here.
Quit display by using the menu.
Now, any commands that you had stacked up will run ... which probably isn't what you wanted to happen.
When we run a process in this way, we say that it is in the foreground.
background
Sometimes then, we want to run a job in the background. This effectively means that the process will run independently of the shell, which means that the shell prompt will be freed up for further commands.
We do this by putting an ampersand (&) at the end of the command:
berlin%
berlin%```

And now you should see the command line prompt appear again (so you can nbow type `ls` if thats what you wanted to do).

You should also have notices something else appearing which would be something like:

```[1] 3568```

The [n] indicates this is the nth job to be started in this shell, and n is the unique job number by which the process may be referenced within that shell (window). The second number on the line (3568) is known as the process ID (PID) of the program. This is the number by which the central processor of the workstation refers to the job. This number is unique to the program you have started, and may be used in any window to refer to this process, as will be see.
bg
If the process you wish to place in the background is already running, it can be stopped using ^Z (Control Z).
The prompt will then return, and the job is placed in the background using the bg command (note: all you type here (after typing display ~plewis/msc/sar.jpg) is ^Z and bg):
berlin% display ~plewis/msc/sar.jpg
^Z

Suspended
berlin% bg
[1] 3568
berlin%```

so display is now running in the background, and the prompt should appear again so you can type new commands.
3.4 Killing a job running in the foreground
Normally, you can terminate a job running in the foreground with ^C (control and c). If that does not work, try ^Z as above, followed by jobs to see the number of the job to be killed, then kill it (see below).
3.4.1 Job control within the Shell
fg
Within its parent window, a job may be referred to in certain commands a %n, where n is the number that was given in square brackets when the process was started.
The job may be brought back into the foreground using:
berlin% fg %n
no prompt will be returned until either the job finishes or is placed back into the background.
kill
The job may be killled using:
berlin% kill %n
or
berlin% kill -9 %n
if it refuses to die the first time.
The priority of the job may be changed to let other people share the workstation:
berlin%
0: old priority 0, new priority 19```
jobs
A list of jobs currently running within the shell may be obtained using the jobs command. On some systems, jobs -l will give the most useful information. e.g.:
berlin% xv ~plewis/msc/sar.jpg
^Z

Suspended
berlin% jobs -l
[1]  +  9524 Suspended           xv ~plewis/msc/sar.jpg```
3.4.2 Killing or changing the priority of a job from outside its parent shell
If you made a note of the PID of each process when it started, then kill and renice can be used as before, but using the PID instead of job number:
berlin%
3568 : old priority 0, new priority 19
berlin% kill 3568```

If you didn’t note the PID, there are two ways to find it:

* run the `top` command in another window and look at the process in the display
* use `ps` (e.g. `ps auxww`)
top
top is a program used to display the processes currently using the most CPU (processing capacity) on a workstation. Typing top in a shelltool should result in a display similar to:
last pid : 3609; load averages : 0.00, 0.00, 0.00 03:47:19

49 processes : 48 sleeping, 1 running

Cpu states : % user, % nice, % system, % idle

Memory : 11984K available, 11812K in use, 172K free, 2572K locked

PID Username PRI NICE SIZE RES STATE TIME WCPU CPU COMMAND

3598 plewis   15 19 125K 99K run 9:20 12:49% 0.95% xv
3609 plewis   26 0 225K 472K run 10:29 7.69% 0.22% textedit
3607 plewis   36 0 422K 432K sleep 0.00 3.23% 0.12% csh```
Look for your program in the far right column, and get its PID from the far left column (in this format). Typing i may reveal more processes if yours is not shown. Typing u and then your username will show only your jobs. Jobs can be killed (k) and reniced (r) from inside top - see ?? for more details.
ps
ps is similar to top, but just lists the processes rather than providing a continuously updated display:
berlin%
USER       PID %CPU %MEM    VSZ   RSS TTY      STAT START   TIME COMMAND
root         1  0.0  0.0  10368   696 ?        Ss   Sep13   0:04 init [5]
rpcuser   4034  0.0  0.0  10180   796 ?        Ss   Sep13   0:00 rpc.statd```
nice
Whenever a job that will either use a lot of the machines processing power (such as an image processing command) or take a long time to run is started, it must be ‘nice’d up’. That is, the priority of the job must be set so that other users can make use of the workstation whilst your job is running. This is achieved using either the renice command, as above, or preferably by using the nice command as the job is started:
berlin%
[2] 3610
This starts xv in the background, and sets its priority to allow fair use of the machine by other people. In fact, xv is not a process that would normally need to be niced, as, unless image processing operations are being performed it usually takes virtually no processing power. It is used here simply as an example.
3.5 remote access
ping
ping sends some test packets to a remote computer and reports on what is returned. Normally, e.g. to check the status of a machine called socrates.ucl.ac.uk you just type:
berlin% ping socrates.ucl.ac.uk
which will report e.g.:
PING socrates.ucl.ac.uk (144.82.110.1) 56(84) bytes of data.
64 bytes from socrates.ucl.ac.uk (144.82.110.1): icmp_seq=1 ttl=252 time=0.527 ms
64 bytes from socrates.ucl.ac.uk (144.82.110.1): icmp_seq=2 ttl=252 time=0.342 ms
64 bytes from socrates.ucl.ac.uk (144.82.110.1): icmp_seq=3 ttl=252 time=0.355 ms
--- socrates.ucl.ac.uk ping statistics ---
3 packets transmitted, 3 received, 0% packet loss, time 2001ms
rtt min/avg/max/mdev = 0.342/0.408/0.527/0.084 ms
Use ^C to quit ping.
If nothing happens for some time, the machine is probably not available (because it is down or the network in unreachable). You can wait for a timeout, or use ^C (Control and C) at the same time) to quit the command. To limit the call to a certain number of attempts, use:
berlin% ping -c 10 socrates.ucl.ac.uk
If the response is:
---
10 packets transmitted, 0 packets received, 100.0% packet loss```

Then you can’t currently access the machine.
sftp
Secure file transfer using ssh protocols. If working from a terminal (shell) and you want to transfer files from your local machine to a machine e.g. shankly.geog.ucl.ac.uk, cd to where the files are on the local machine, then type:
berlin% sftp shankly.geog.ucl.ac.uk
at which point you will normally be prompted for a password. If the username on the local and remote machines are different, you should use:
berlin% sftp plewis@shankly.geog.ucl.ac.uk
You can then use the limited command set within sftp to change directory etc. and copy the files to or from the remote machine. A typical session then would be something along the lines of:
sftp>
sftp> put theFileIWantToTransfer.dat```

to copy the local file `theFileIWantToTransfer.dat` into the directory `whereIWantToPutTheData` on the remote machine. Similarly to pull a file from the remote machine, use `get` rather than `put`.

Use `exit` to exit the `sftp` session.
scp
Sometimes, it is convenient to use scp, a secure copy command that you can use over digfferent machines on the network when they do not have common disk access. The syntax is of the form:
scp plewis@shankly.geog.ucl.ac.uk:///home/plewis/msc/hello.dat ~/DATA/helloLewis.dat
ssh
Securely connect (‘log in’) to a shell on a remote computer. To set up an interactive session, from a terminal or ssh client type:
home% ssh plewis@shankly.geog.ucl.ac.uk
and respond to any confirmation request (the first time you connect two machines) and the request for your password.
If you wish to run a session that uses X11, you need to set X11 tunneling:
home% ssh -X plewis@shankly.geog.ucl.ac.uk
on most unix/linux machines, or:
home% ssh -Y ucfaabc@shankly.geog.ucl.ac.uk
from OS X.
From a Windows machine, you should be able to connect using a client such as putty, but this does not directly allow X11 sessions. To do that, you need some X11 software (on the Windows machine) such as exceed. You can purchase that software, or at no cost, use a WTS session (see above) to start up exceed and then use e.g. putty (or tools in exceed) with X11 forwarding.
There are several alternatives to this from a Windows machine, one of which is to set up a unix environment within windows using cygwin but that might be too complex for novice users.
Another is to make your Windows computer dual boot and install a linux system such as ubuntu on it.
Yet another is to run linux as a virtual machine on top of Windows (or the other way around!).
Another alternative is Xming that will run X11 on top of windows.
Please note that whilst there are all of these potential solutions, we do not endorse or provide support for any particular solution. If you want to be able to do this and think it would be useful, try it out yourself and use the internet for resources to help you solve any problems you come across. If you have particular problems you think are connected with the UCL end of things, you can try asking the Geography System Manager, or ISD (if it is a UCL issue), or at a push, Professor Lewis in his office hours.
Important: Note that you cannot use ssh (or sftp) to connect to any of the UCL Geography computers, as we only have a small number open to the UCL firewall (such as shankly.geog.ucl.ac.uk) and the machines we do have open are not ones you would normally want to do any processing on (or at least, we don’t want everyone processing on these gateway machines, as noone else will be able to get in).
You will normally have to use ssh to get on to one of these firewall gateway machines, then ssh (normally ssh -X if you want to maintain X11 port forwarding) from there to a machine (e.g. one in the classroom) to do any processing. This might seem a little ‘roundabout’, but you will soon get used to it and it is like this for good security reasons.
N.B. if your username is different on the two machines, use e.g. ssh -X ucfaabc@socrates.ucl.ac.uk or ssh -X socrates.ucl.ac.uk -l ucfaabc to give the correct username for the remote machine (the one you are trying to log on to), otherwise you can just use ssh -X socrates.ucl.ac.uk.
Once you (think you have) established a remote session with X11, you should test it out, trying to open a simple application such as xclock or xv or xeyes from the remote machine onto your local machine.
If you are sure you are on a secure machine, you can set things up so that you don’t have to keep typing the password when you connect (see here) but remember that anybody else will be able to connect those machines without a password.
Finally, if what you want to do with ssh is not to run an interactive session, but to run a process on the remote machine (e.g. for some parallel processing), then you would normally use ssh -f for this, with the option -X (or -Y for OS X) if the processing requires X11. A simple example would be, get a listing of your home directory:
home% ssh -f ucfaabc@shankly.geog.ucl.ac.uk "ls -l /home/plewis"
This will execute the sequence of commands in quotes on the remote machine, then, when completed, terminate the session (that is what the -f flag does). If you want to ssh from that machine onto another (to run a process) that is a little more involved.
One way to do this would be e.g.:
home% ssh -f shankly.geog.ucl.ac.uk 'ssh -f berlin.geog.ucl.ac.uk "uname -a;pwd; cd /home/plewis ; ls -l"'
which will ssh onto shankly.geog.ucl.ac.uk and from there run an ssh process onto berlin and then run the requested sequence of commands. Note that in this case you will have needed to previously ssh'd from shankly to berlin to have responded to the authentification request. This is a littler convoluted, especially the use of quotes here but is it feasible and sometimes useful to do this. You are much more likely to make use of this sort of command directly from within the UCL Geography system, in which case you do not need multiple levels of ssh calls to get through the firewall.
3.6 Exercise
This final section covers a bit more than the basics of unix, and in that sense, is a bit more than what we consider critical for you in this class. If you do learn these few other commands though, you should (hopefully) feel empowered to do more with your computers and get some real control over whats going on (rather than just clicking a button or sliding a slider).
As a follow up to this section, you could try to see if you can access the unix system from outside of the lab and copy files to and from another computer.
You might also like to look at further command line options for some of these commands. Mostly, there is a --help option (e.g. ls --help) that you can use. You can also access manual pages (type: man ls) or on some systems info pages (type: info ls). This will give you more depth to your understanding of what you can do with these commands.
Getting to 'guru' status in unix will take you some time, but the more you explore and try things on the operating system, the more you will learn. If you are worried about breaking things, or just want to explore more, buy a cheap computer such as a raspberry pi (around £25), install a free version of linux on it, and play!
Finally, one other skill you might like to develop is to learn to write some shell programs (e.g. in bash). This can be a very useful thing to be able to do as you essentially make your own unix program by combining others. We will learn such skills using python in subsequent sessions, but there is value to at least learning the basics in a lower level shell language (e.g. bash or csh.
3.7 Summary
In this section, you should have learned a wider set of commands to control what is going on in the unix environment a little more. You may not remember all of these to start with, but can use this page as a reference as you explore what you can do with the operating system.
Commands in this section
[awk] : pattern scanning and interpretation language
[>>] : appending to file
[bg] : background process
[cat] : concatenate
[date] : date
[echo] : echo
[fg] : foreground
[grep] : globally search a regular expression and print
[jobs] : process jobs
[kill] : kill a process
[less] : less
[more] : more
[nice] : nice a process
[ping] : ping
[|] : pipe
[ps] : process show
[sed] : stream editor
[scp] : secure copy
[sftp] : secure file transfer protocol
[ssh] : secure shell
[>&] : standard error >& or 2>
[<] : standard input <
[>] : standard output >
[streams] : streams
[top] : top processes
[vi] : vi editor
[wc] : wc
4. Summary of all commands
[awk] : pattern scanning and interpretation language
[>>] : appending to file
[bg] : background process
[cat] : concatenate
[cd] : change directory
[chmod] : change mode
[cp] : copy
[date] : date
[df] : disk free
[du] : disk usage
[. ]: dot (current level)
[..] : dot dot (up one level)
[echo] : echo
[fg] : foreground
[grep] : globally search a regular expression and print
[jobs] : process jobs
[kill] : kill a process
[less] : less
[ls] : list
[ls -l] : long listing
[more] : more
[mkdir] : make directory
[mv] : move
[nice] : nice a process
[passwd] : change password
[ping] : ping
[|] : pipe
[ps] : process show
[pwd]: print working directory
[quota] : personal disk quota
[rm] : remove
[rmdir] : remove (empty) directory
[sed] : stream editor
[scp] : secure copy
[sftp] : secure file transfer protocol
[ssh] : secure shell
[>&] : standard error >& or 2>
[<] : standard input <
[>] : standard output >
[streams] : streams
[top] : top processes
[~]: tilde (twiddle) - home
[vi] : vi editor
[wc] : wc
[*?] : wildcards